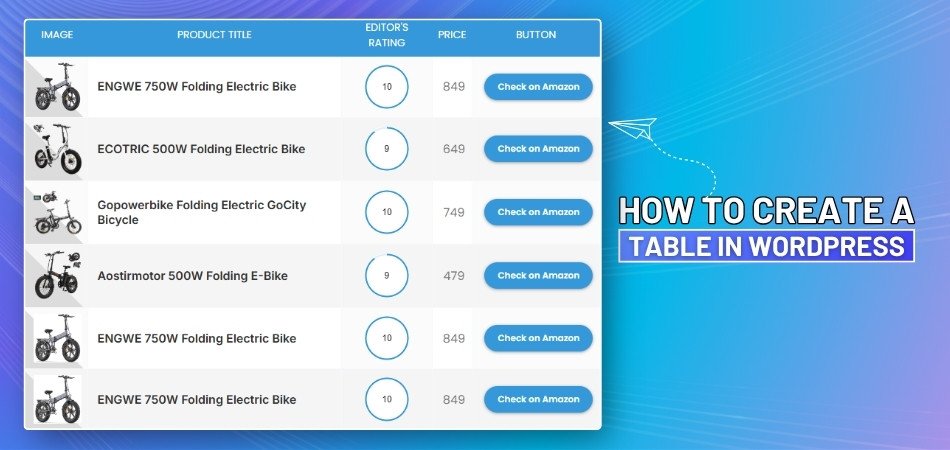
How to Create a Pricing Table in WordPress?

Adding a pricing table in WordPress is one of the smartest ways to show your offers clearly. It helps visitors see your plans side by side, making it easier to choose. You might already be thinking about how to create a pricing table in WordPress.
Create a pricing table in WordPress using tools like One Click Table. Sign up, choose a pricing template, and fill in product info. Customize buttons and add images. Publish the table, copy the code, and paste it into a post with the provided CSS.
If this topic feels interesting or if you’re trying to make your website more helpful for your visitors, this article is the right place. You’ll find all the important steps, layout ideas, and tools you need to build a good-looking pricing table that actually works.
How to Create a Pricing Table in WordPress?
Adding a pricing table to your website helps people compare your offers. You can use it to show different plans, features, or service levels. WordPress makes this process very simple, even without using any code. If you’re curious about how to set it up, keep reading below.
Step 1: Choose a Tool to Build Pricing Table
Before jumping into table creation, it's important to pick a tool that makes the process simple and quick. For beginners or anyone who wants to skip complex coding, One Click Table is a great choice. It offers prebuilt templates and a user-friendly interface designed to help you build and publish pricing tables without hassle. If you want something that looks good on any screen, especially for those looking for a responsive WordPress table, tools like this make it easier without extra settings.
Step 2: Register or Log In to Get Started
Go to the One Click Table website and sign up if you're new. Click the Sign-Up button, fill in the form, tick the required checkboxes, and complete the captcha. After registering, log in using your ID to access the dashboard. If you already have an account, just log in directly. You’ll be taken straight to your main workspace after logging in.

Step 3: Start Building Your Table
Once inside the dashboard, click on “Create New Table.” A selection of prebuilt templates will appear for different types of tables, including pricing tables. Pick the one that suits your needs best. After choosing a template, you’ll be asked to enter a title, category, and website (these fields are optional for now). This setup helps keep your tables organized and easily accessible later.

Step 4: Save and Access Your Table for Editing
Click the Save button after filling in the title and other optional fields. Your new table will now be stored in the “My Workspace” section of your dashboard. You can return to this section any time to open and edit your saved tables. Click on the saved file to launch the editing screen. The layout will depend on the template you selected earlier.

Step 5: Fill in Pricing and Product Information
Inside the editing interface, click the edit icon to change text and pricing details. Add product names, descriptions, features, and exact prices as needed. If you want to list more products or plans, click “Add Item” to create new rows. Each section can be edited individually to match your offerings. Always click Save after making changes to ensure updates are stored.

Step 6: Customize Buttons and Links
Each pricing box includes a button where you can enter your call-to-action. Set a title like “Buy Now” or “Choose Plan” to make it clear. Paste the link you want users to visit after clicking the button—usually your checkout or product page. This helps guide visitors directly where you want them. Don’t forget to save once you've updated all buttons.

Step 7: Upload Images
If you want to include product images, first upload them to your WordPress media library. Once uploaded, copy the image’s URL. Paste this URL into the image field of your table for each product row. This can improve the visual appeal of your pricing table. Save your updates before moving forward.

Step 8: Publish the Table and Use It in WordPress
After finalizing your edits, click Publish to generate the code. Copy this code, then head to your WordPress dashboard. Open a new post or page and paste the code where you want the table to appear. For proper styling, also paste the CSS code (provided in the tool) right above the code. When done, save the page, and your pricing table will appear as designed.


A pricing table helps people compare and choose what fits them best. Keep it clean, simple, and always up to date for the best results. Use tools that make the process fast and don’t need coding knowledge. When done right, pricing tables can help bring more customers to your site.
What Key Features Should You Include in a WordPress Pricing Table?
Creating a pricing table in WordPress might sound tricky, but it’s actually pretty simple when you know what parts to include. A good table doesn’t just show prices — it also helps people make a clear and quick decision. You’ll find a few must-have parts that make any pricing table work well. Keep reading to find out what those are and how to use them the right way.
Plan Names
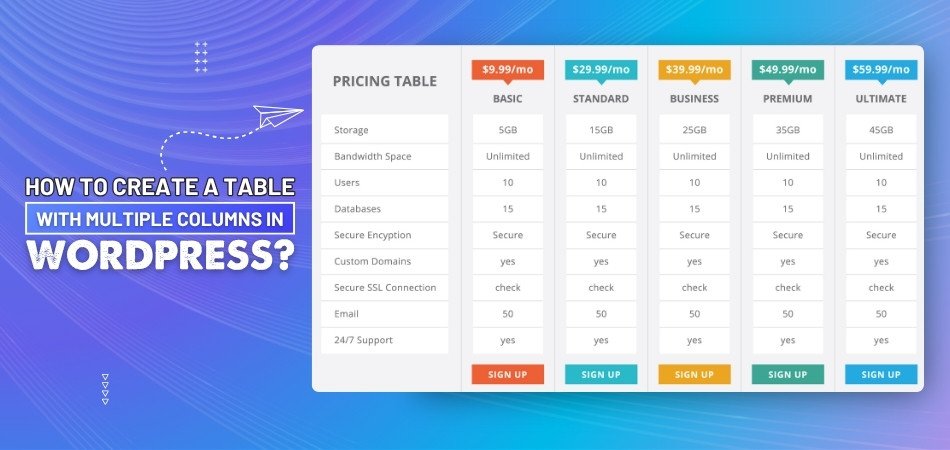
Every pricing table should start by showing clear plan names. These names help people quickly understand what they’re looking at. You can go with simple labels like Basic, Standard, or Premium. If you want something more fun, you can try names like Starter, Pro, or Team. Just make sure the name matches the type of plan and what it offers. This part should be easy to read and not confusing at all.
Price Display
Showing the price clearly is very important. Use large font size and bold text to make the price stand out. Also, mention if it’s a one-time fee or a monthly charge. Some tables also add a small note below the price that explains taxes or discounts. Try to keep it clean and not overcrowded. The main goal is to let people know what they’ll pay without making them search for it.
Features List
This part tells what each plan offers. Use bullet points to keep things neat and readable. You don’t have to list every tiny thing—just the most useful ones. Make sure to line up the features across different plans so it’s easy to compare. For example, show things like “10GB storage” or “Unlimited support.” A good features list helps people choose the right plan for them quickly.
Call-to-Action Buttons
A call-to-action (CTA) button tells the reader what to do next, like “Buy Now” or “Start Free Trial.” These buttons should be colorful, big enough to see, and placed right below each pricing box. Try using action words that sound friendly and simple. You want people to feel ready and excited to click. A clear CTA helps turn visitors into real users.
Highlight One Plan
Most pricing tables have one plan that’s recommended or the most popular. You can highlight it with a different color or a small tag like “Best Value.” This draws attention and makes people more likely to pick it. It works well because many people feel unsure, and the highlight gives them a little extra help to decide faster. Just make sure it’s honest and helpful.
Now you know the main parts that make a WordPress pricing table clear and helpful. Each section plays a small but important role in helping people decide faster. When all parts work together, the table feels easier to understand. Try using these tips to build a pricing table that really works.
What Layout Styles Work Best for Pricing Tables in WordPress?
A good pricing table can help people understand options quickly without reading too much. Some layouts look better, work faster, and feel easier to use. The way you organize information also affects how people choose. Let’s check which layout styles actually make things better.
Side-by-Side Format
Many websites prefer showing all their pricing options next to each other. This style makes it easy for people to compare features at a glance. Each column stands for a different plan with its own price and details. It keeps everything balanced and clear without confusing the reader. If you're already using tables for product features, adding comparison tables in WordPress helps match that same style. That way, your pricing and features follow a similar look.
Highlighted Best Plan
Sometimes, one plan is more popular or recommended than the others. In that case, it's smart to highlight it by using a bold color or border. This draws attention and helps people decide faster without thinking too much. The highlighted plan usually sits in the middle of the table for balance. That simple touch can guide the reader to choose what’s best. Just be sure not to overdo the colors or crowd the layout.
Grid With Icons
Adding small icons next to text makes a pricing table look friendlier. It also helps people understand things faster without reading every word. For example, a checkmark shows a feature is included, and a lock might mean limited access. The grid format keeps all these features lined up neatly in rows. This style is fun to look at and easy to follow. You don’t need to add too many details—just what matters most.
Toggle Switch Option
If you offer prices for monthly and yearly plans, a toggle switch is super helpful. It lets visitors switch between the two without leaving the page or scrolling too much. This layout saves space and avoids showing two full tables. The switch usually sits above the pricing table and updates the numbers instantly. It’s a smart way to keep your site clean while giving people more options in one spot.
Minimal Box Style
This layout is perfect for websites that want to keep things clean and simple. It works best when you have only a few plans or options to show. Everything looks neat, and the page loads faster without too much detail.
Here are some popular styles often used in this layout:
- Basic Plan Box
- Premium Plan Box
- Stacked Pricing Box
- Side-by-Side Box
- Single Option Box
- Flat Rate Box
- Simple Grid Box
- Feature Light Box
- Clean Borderless Box
- Focused CTA Box
Picking the right layout helps your pricing table stay clear and easy to read. A simple style with balanced design always works better for quick decisions. Try layouts that match your content, not just what looks fancy. Keep it simple, useful, and easy for everyone.
How Do You Guide Visitors to Choose the Right Plan?
People often feel confused when they see too many plans on a page. It can be hard to know which one fits their needs the best. Clear layout and smart tips can really help with decision-making. Let’s explore some easy ways to guide them well.

Use Clear Labels
Every plan should have a simple name that makes sense at first glance. Names like “Starter,” “Popular,” or “Advanced” give a quick idea of what to expect. These labels help visitors match their needs with the right choice. Without clear names, they might skip or choose the wrong one. A small description under each label also makes things easier. Just a few helpful words can point people in the right direction without too much effort.
Highlight Key Features
Visitors look for the things they care about the most, not everything. So, show the top 3–4 features of each plan right at the top. Use short points or icons to make them easy to spot quickly. That way, visitors can compare benefits without reading long paragraphs. This small step helps them feel confident in what they’re picking. You don’t need to explain everything—just the most useful parts that matter to them.
Add a Recommended Tag
When visitors see multiple plans, they might feel unsure about which one to pick. A small tag or label can help guide them toward the best choice. These tags draw attention and make the decision easier. Here are some common tag names used in pricing tables:
| Tag Name | Placement Tip | Example Sentence |
| Most Popular | Place in the middle plan | “This is our most popular plan, perfect for most users.” |
| Best Value | Use for plans with max features | “Get the best value with all premium features included.” |
| Top Pick | Highlight the plan with top reviews | “Our top pick by users who need extra tools.” |
| Recommended | Tag one plan to guide choices | “We recommend this plan for the best overall balance.” |
| Editor's Choice | For an expert-selected plan | “Editor’s choice based on features and pricing.” |
| Customer Favorite | Based on high customer use | “A customer favorite with thousands of happy users.” |
| Limited Time | For a plan with a time offer | “Special pricing available for a limited time only.” |
| New | Tag the latest added plan | “Check out our new plan with fresh updates.” |
| Best Seller | Highlight highest sold option | “Our best seller, trusted by the most customers.” |
| Great Deal | Use for a discounted or promo plan | “Grab this great deal while the offer lasts.” |
Simple changes like labels or clear points can guide better decisions. Try not to fill the page with too much text or flashy designs. Just focus on helping people pick what’s right for them quickly. That’s how smart pages work better.
Use Comparison Tools
A side-by-side setup helps visitors see differences between plans more easily. You can line up features so they’re easy to scan in one place. This works well when plans look similar at first but offer different things. Some websites also use product review tables to show how each option stands out. These make the page look clean and give people what they need to decide. It keeps everything clear without too much clutter.
Keep It Simple
Too much information can slow people down or confuse them. Keep the layout light, the details short, and the words easy to understand. Stick to what really matters and remove things that don’t help. A short sentence and a clear button can do more than big blocks of text. When everything is simple and tidy, more people feel ready to choose. That makes the whole process easier for everyone visiting the page.
Helping people choose the right plan doesn’t need to be complicated. A simple layout with helpful hints can make a big difference. Focus on what matters and keep everything clean and clear. That’s the best way to guide smart choices.
Mobile Optimization Tips for WordPress Pricing Tables
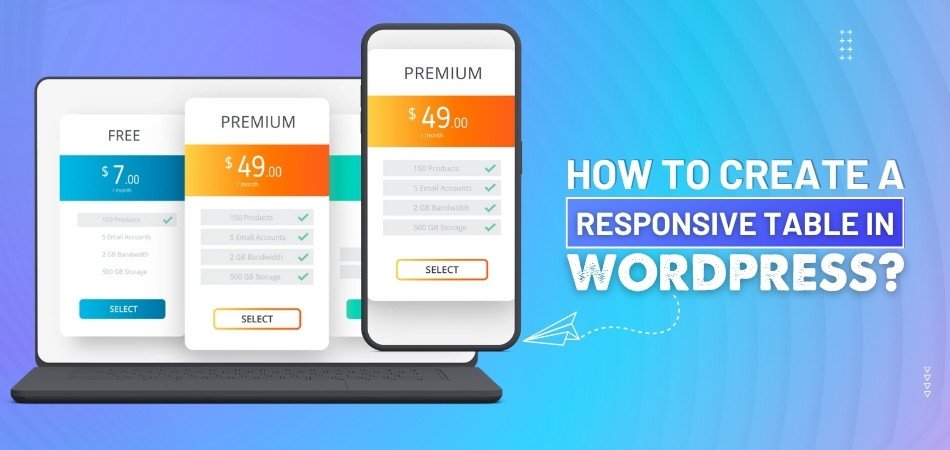
Most people use their phones to check websites, even when looking at pricing plans. If your pricing table doesn’t work well on mobile, visitors might leave quickly. A clean, simple design makes it easier to read and understand. Follow these helpful tips to keep your pricing tables user-friendly on every screen.
- Responsive Design: Choose a theme that automatically adjusts the layout for smaller screens, making your pricing tables look great on all devices.
- Mobile-Friendly Navigation: Make sure menus and buttons are easy to tap so users can move through your site without trouble on mobile screens.
- Optimized Images: Use tools like WP Rocket or ShortPixel to reduce image sizes and keep pages loading fast without losing quality.
- Simplified Pricing Table Structure: Keep things clean by grouping similar plans and using icons or colors so people can compare quickly on their phones.
- Responsive Typography: Fonts that are too small make reading hard, so adjust text size and spacing to stay readable on any mobile screen.
- Test on Multiple Devices: Don’t just rely on one phone—check your tables on different screens and browsers to catch issues before visitors do.
- Remove Unnecessary Elements: Take out pop-ups, widgets, or sidebars on mobile layouts so the page loads faster and stays easy to read.
Making your pricing tables mobile-ready helps visitors find what they need quickly. A clean and simple mobile view can keep people from leaving your site. Small changes can lead to better results and more clicks. Always think about mobile when building your WordPress pricing table.
Commonly Asked Questions
If you still have questions after reading the main guide, don’t worry—this section is here to help! Below are some common things people ask when they’re building a pricing table for their WordPress website. These answers are written in a way that’s easy to understand, even if you’re just getting started.
What Is the Main Purpose of a Pricing Table?
A pricing table helps people compare your offers side by side. It makes it easy to show the differences between basic and premium plans. With this table, visitors can quickly see which plan fits their needs. It helps them make a faster and smarter choice.
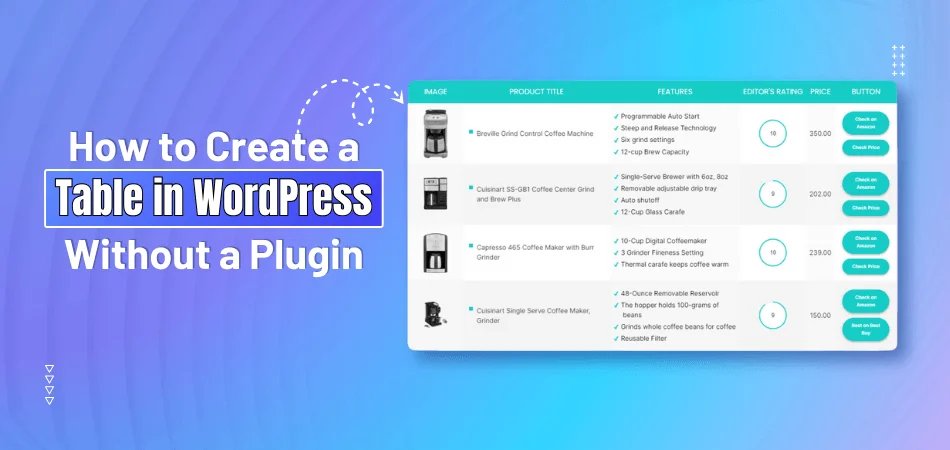
Can I Make a Pricing Table Without Using a Plugin?
Yes, you can use WordPress’s built-in block editor to make a simple table. Just add a table block, then fill in the rows and columns with your pricing details. While it won’t be fancy, it works well for small websites or quick setups. You don’t need to install anything extra.
How Do I Add Colors to My Pricing Table?
You can change the background and text colors using most page builders or block settings. In WordPress, click on the table block and look for color options in the right-hand menu. Choose colors that match your website and are easy to read. This helps make your table look better and more organized.
What Should I Do If My Table Looks Messy?
If your table looks confusing, try removing extra rows or columns. Keep only the most important details, like price, features, and plan name. Use short words and make sure everything is lined up. A clean and simple table is easier for visitors to read and understand.
Is It Possible to Copy a Pricing Table From One Page to Another?
Yes, you can copy the whole table block and paste it onto another page in WordPress. Just make sure to check the layout after pasting to see if anything moved. If you use a page builder like Elementor, you can also save the section as a template. This saves time when using the same design again.
How Do I Add a Currency Symbol in My Table?
To add a currency symbol like $, €, or £, just type it before the number in your pricing cell. Most table tools or editors accept these symbols without needing extra settings. Make sure all prices use the same format for a cleaner look. This helps avoid confusion for your visitors.
What Happens If I Add Too Many Plans?
If you include too many plans, your table might look crowded or confusing. Try to limit your pricing table to 3 or 4 clear options. This helps visitors compare without getting overwhelmed. You can always explain more details on a separate page if needed.
Can I Make My Pricing Table in Different Languages?
Yes, many WordPress tools support multiple languages. You can use plugins like WPML or Polylang to translate your table into other languages. This is useful if your website has visitors from different countries. Just make sure the layout stays the same after translation.
How Can I Make My Table Match My Website Style?
Use the same fonts, colors, and button styles that your website already has. This keeps your table from looking out of place. Most tools let you change the design easily with a few clicks. A matching design makes your site look more professional and trustworthy.
Why Isn’t My Pricing Table Showing Correctly?
This can happen if your theme doesn’t support tables well or if something broke during editing. Try switching to a different theme or checking the table layout in preview mode. Also, clear your website cache if you use a caching plugin. A few small fixes usually solve the problem.
Bottom Line
Pricing tables are a smart way to show your plans clearly, and they help people compare options without confusion. A simple design with helpful labels can guide them to make faster choices. Clean tables lead to better results and trust.
If you’re still wondering how to create a pricing table in WordPress, the answer is easy: use a tool like One Click Table, follow a few steps, and paste the code into your post. No coding needed, just simple editing and styling.
Before you go, remember to keep your layout mobile-friendly, use bold buttons, and test everything on different devices. Good luck building your pricing table—keep things simple, helpful, and honest. You’ve got this, and best wishes ahead!
_348.jpg)